The best way to deploy windows updates according to my experience is by using Automatic Deployment rules.
To setup a working Deployment rule there are few configurations and settings that need to be in place and working without errors.
1. Software Update Point (SUP) : Products and Sync Schedule
2. Site System role : Proxy Account
3. Device Collection : Query based collection
4. Client Settings
5. Automatic deployment rule
1. Software Update Point (SUP):
Lets start by checking SUP configuration.,
Under \Administration\Overview\Site Configuration\Sites

Make sure you have selected the proper Operating System under “Products” tab for which you have planned to install updates.

Schedule Sync Software Updates under Sync Schedule tab

2. Site System Role : Proxy Account
In case if there is a proxy server used to access internet, we need to configure the Account which has access to internet so that the updates get downloaded.
Under \Administration\Overview\Site Configuration\Servers and Site System Roles go to the properties of Site System to configure Proxy Account.

3. Device Collection : Query Based
For this you need to have a properly planned Active Directory (AD) structure.
Lets say we have a separate Organizational Unit (OU) for Servers and another OU for Computers (user PC).
When a new Server is joined to domain you place the Server Account (computer account) in the Servers OU. Same goes for user PC’s
Here we will focus on Servers.
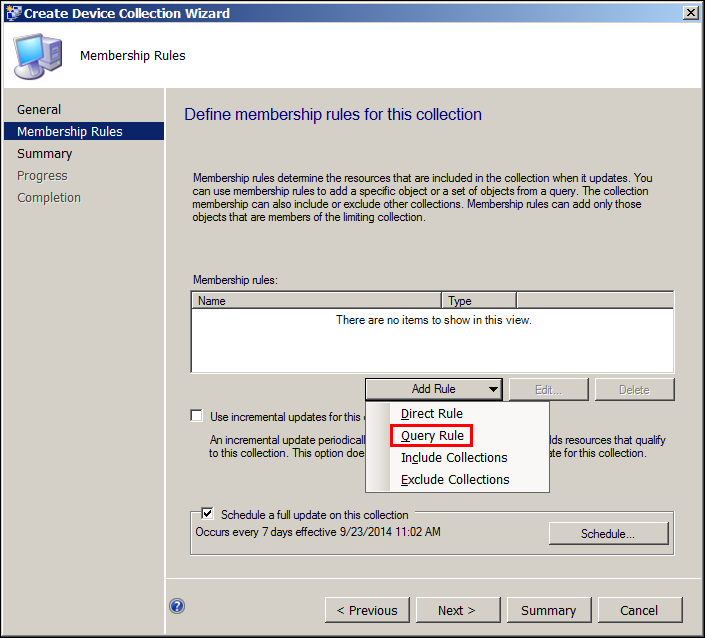
Now we create a Device collection based on the OU and Operation System installed on server.
Under \Assets and Compliance\Overview\Device Collections\ Right click on Device Collections and Select Create Device Collection

1st Criteria will be the OU
Value must be the OU that contains Servers computer Account in AD

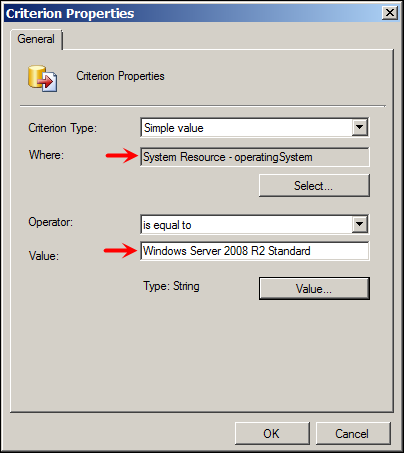
2nd Criteria is Operating System of Server (2008 R2 Std)
User value… button to select OS.

3rd Criteria is again Operating System, but this time value is different (2008 R2 Ent)

Verify and arrange the query as below

Click OK till you reach the main wizard page and Select “Use incremental updates for this collection” and complete the wizard by clicking Next.

You will find the Collection starts populating if there are Servers in the OU and matches the criteria we have defined.

4. Client Settings
Now we need to setup a custom client settings for in general “Server” device collection
Under \Administration\Overview\Client Settings create a new Device Settings with following as the values.
Note: Here I am showing settings which effect the update deployment.

The Schedule for Software Updates is very short in the example below, its might increase load on the system.

Now we need to apply these settings to Device Collection that we created (Windows Server 2008 R2 Dyn Collection).
Right Click on the Device Settings and Select Deploy option, Select the Collection that we created and complete the wizard.
5. Automatic Deployment Rule
Under \Software Library\Overview\Software Updates\Automatic Deployment Rules, right click and select Create Automatic Deployment Rule.
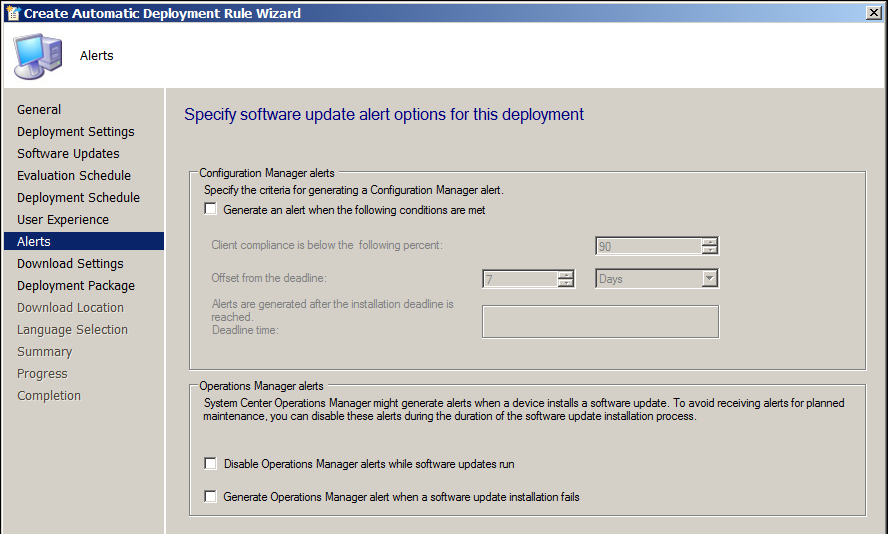
Follow the Wizard with settings as below.

This page is very important and make sure you have done proper selection, based on the values specified here the updates will be downloaded.

Note: The value for Title is specified as x64, which means any updates which has “x64” in title will be selected, because we generally use x64 bit OS in production.
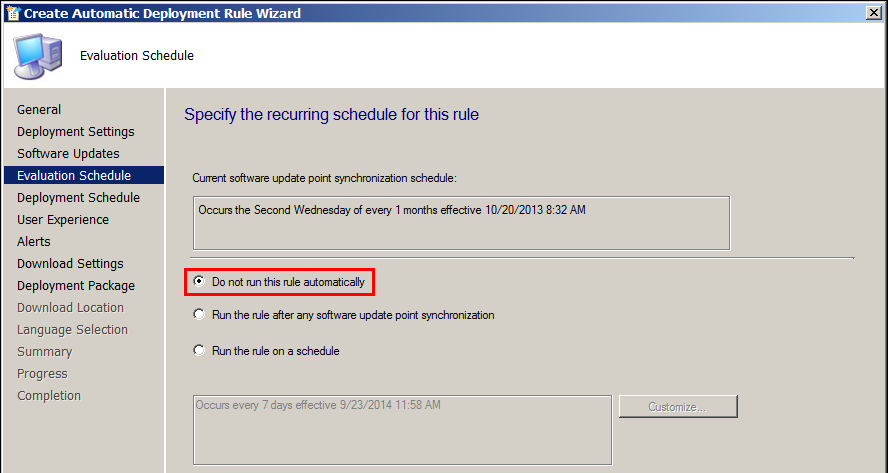
On schedule page, in the case of updates deployment to server I have selected “Do not run this rule automatically”
Selection of this option depends on how you plan to deploy newly released updates to servers.
If “Do not run this rule automatically” is selected, we need to make sure that we run this ADR manually whenever we are comfortable with newly release updates and want to include those updates in Update Group created by this rule.
In case if we are targetting User PC’s device collection, then the proper selection would be “Run this rule after software update point Sync”
Remember we configured Sync Schedule in 1st section (SUP), when that sync runs on schedule this Automatic Deployment Rule will run and newly released update will be downloaded and included in Update Group.

On Deployment Package page, If you already have a Defined Package Location use that, else Create a shared folder on Server.
Use that share location to create a new Package.

Add a Distribution Point here.

Complete the Automatic Deployment Rule Wizard.
Next, Run the ADR, right click and select Run Now option
This will create a new “Software Update Group” this group contains the updates that are found by the rule.
Use CMTrace and wsyncmgr.log (Sync), Ruleengine.log and Patchdownloader.log (Automatic Deployment Rule) these logs are present on SCCM server.
Once the Server/Client PC receives new client settings, the Update scan and deployment on updates will start as per defined in client settings.
To force Configuration Manager client to download new Policy, use “Configuration manager” found in control panel under the Actions tab and Run “Machine Policy retrieval and evaluation cycle” wait for couple of minutes, Run “Software update scan cycle” wait for few minutes and finally Run “Software updates deployment evaluation cycle”
This post might not be the perfect guide but will give an idea on what all is involved to setup Automatic Deployment Rule.
If you have questions please post in comments.
Hope it helps.


